

Customer ban approvals
Let operators raise a ban request instead of banning outright, and have a named approver check it first. Every ban then carries a reason, the details behind it, and a note on the customer record.
Setting it up
Only ban admins see any of this. Everyone else gets the request form in Step 5.
Step 1: Open Manage Customer Bans
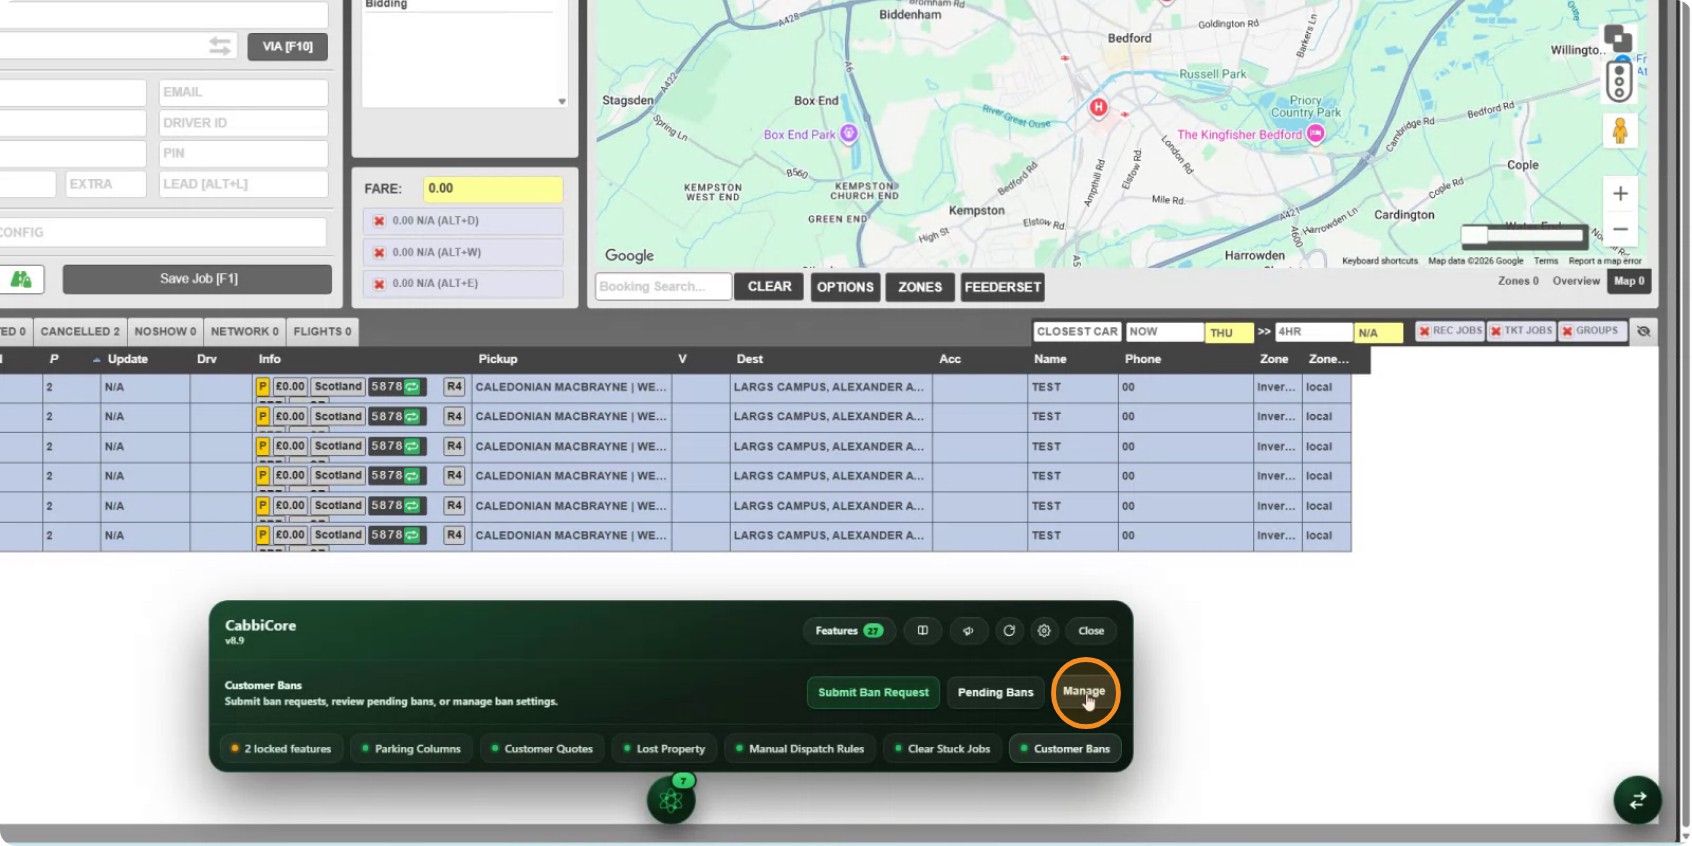
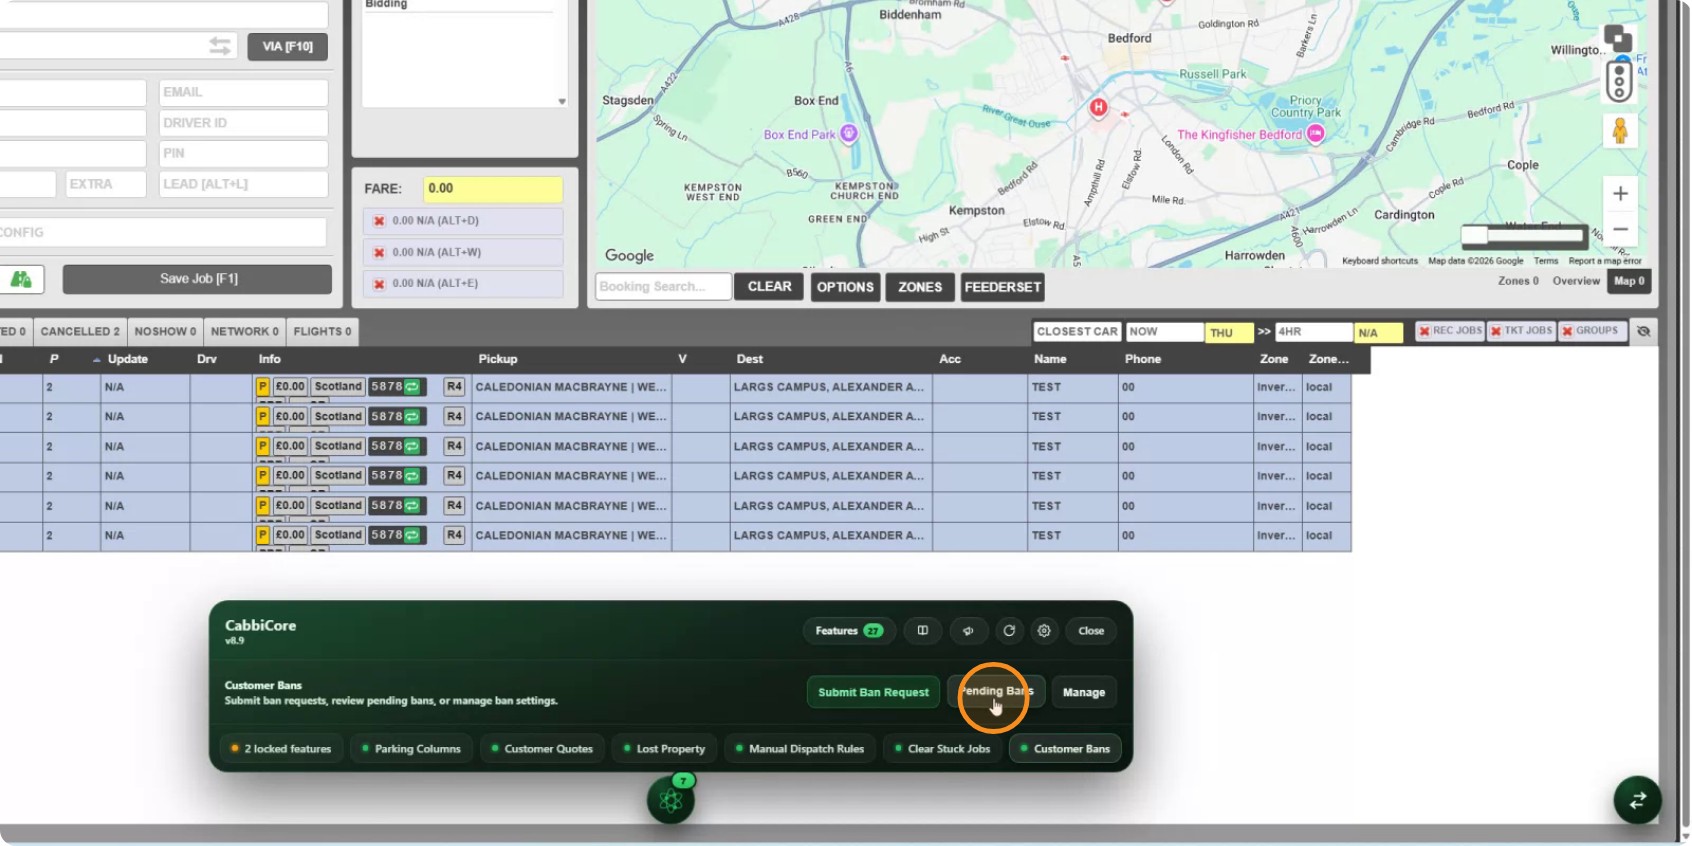
In the CabbiCore console, open Customer Bans and choose Manage.
Step 2: Choose who can approve
Under Ban Admins, name the people allowed to approve bans and to unban customers.
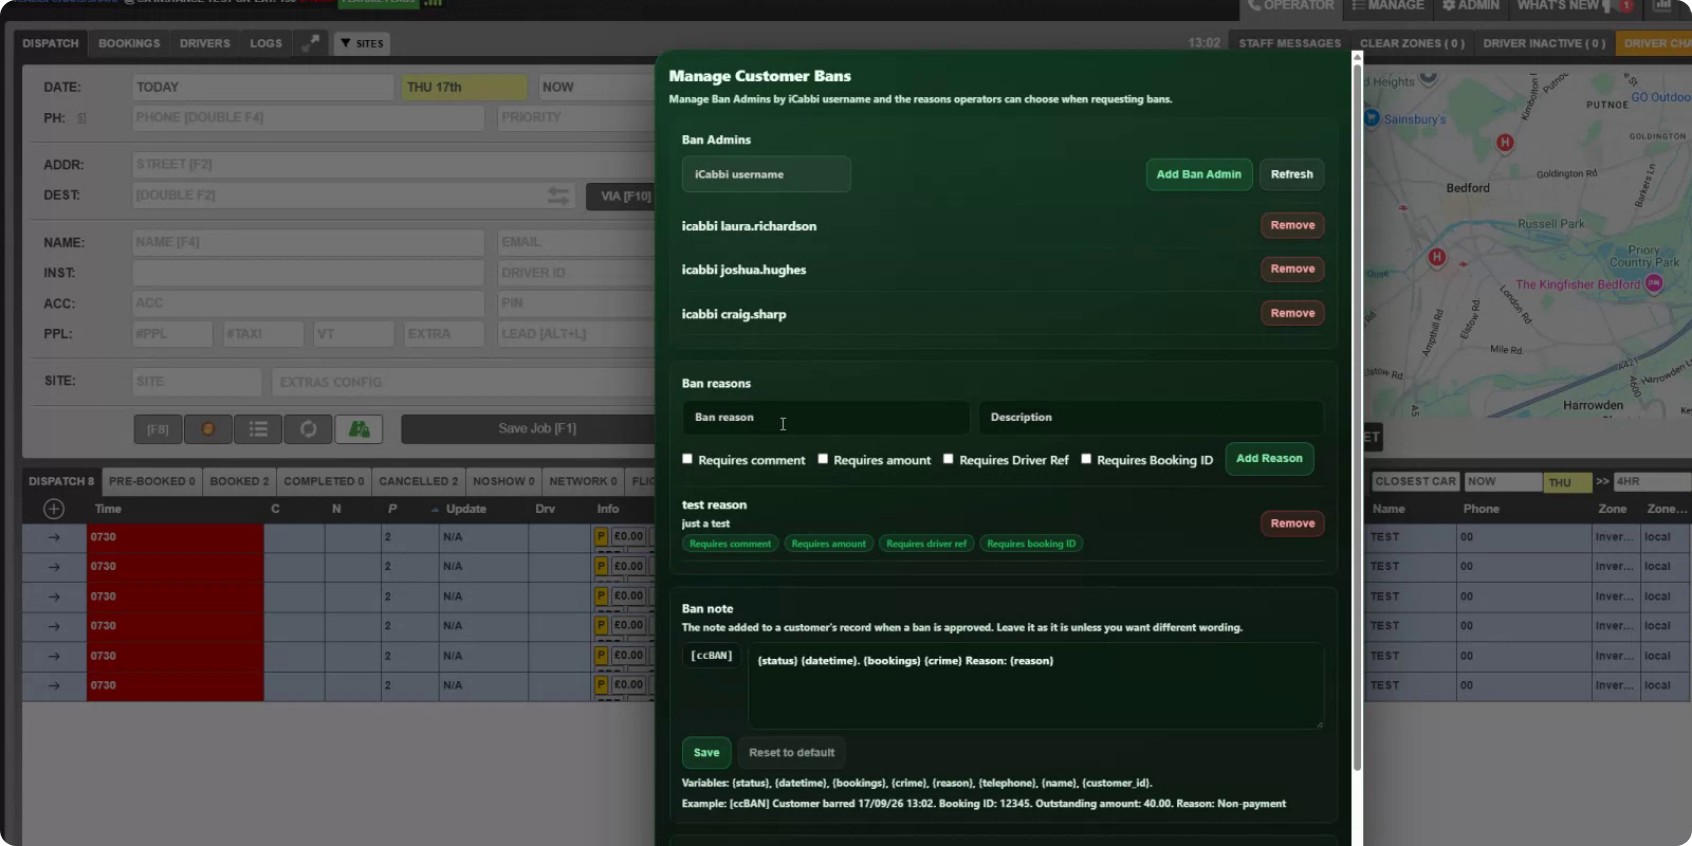
This list does the work. Anyone on it can approve, reject and unban; anyone not on it can only raise requests, even if they have Manage Customer permission in iCabbi. iCabbi permissions do not grant a CabbiCore unban.
Step 3: Set up your ban reasons
Under Ban reasons, add the reasons an operator can pick from.
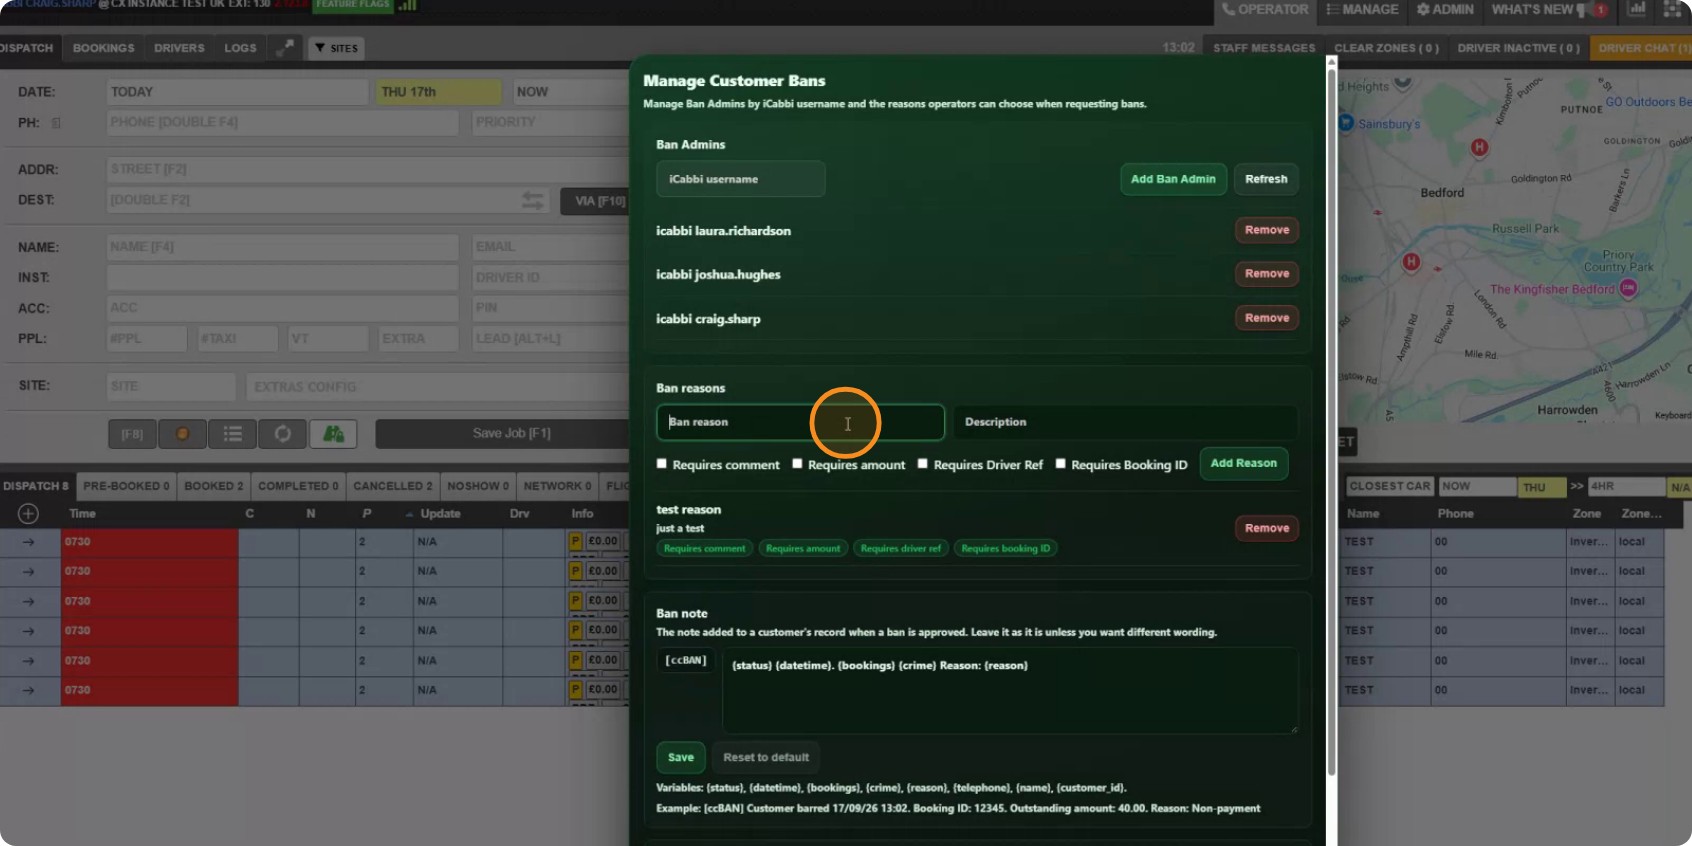
For each reason you decide what the operator must fill in before they can submit:
- Comment — must be longer than five characters
- Booking ID
- Amount owed
- Driver reference
Crime reference is always available and never required.
Tick only what that reason genuinely needs. A reason demanding four fields for something an operator reports ten times a night is a reason they will work around.
Step 4: Write the note that lands on the customer
When a ban is approved, CabbiCore writes a note onto the customer's record in iCabbi. You can set the wording per fleet.
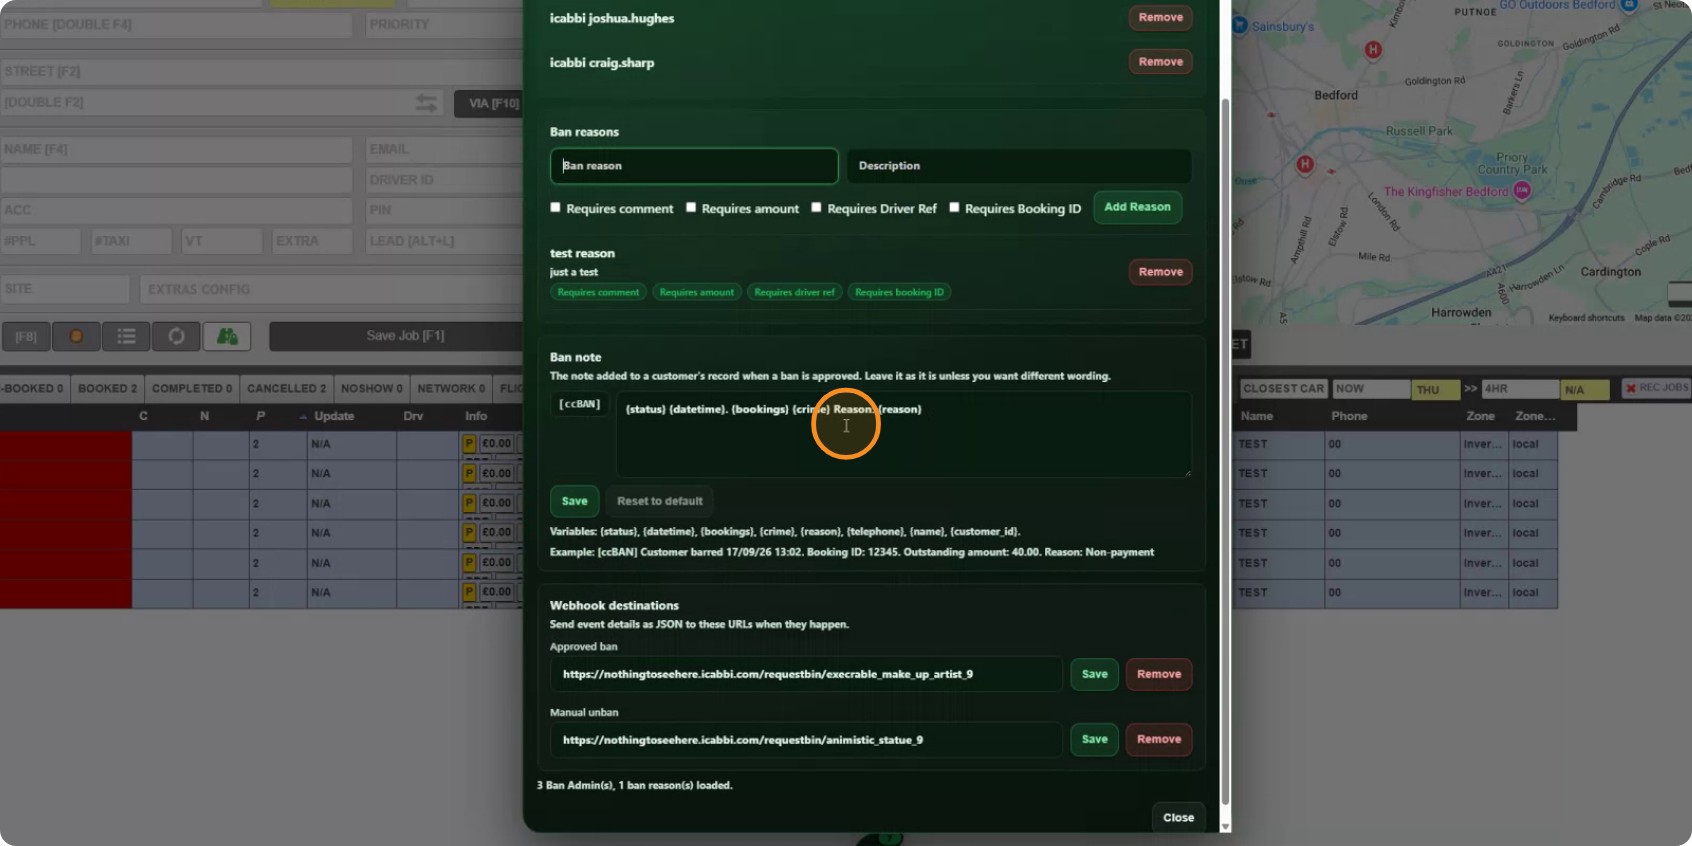
Two things about that note are worth knowing:
- Every note carries a
[ccBAN]marker. You cannot remove it, and you should not try: it is how an unban finds the notes to clear. Without it a banned customer can never be cleanly unbanned. - The
{bookings}and{crime}placeholders print their own labels alongside their values, because the unban webhook reads those labels back out of the note text.
Step 5: Send bans to another system (optional)
You can give CabbiCore a web address to call when:
- a ban is approved, or
- a customer is manually unbanned
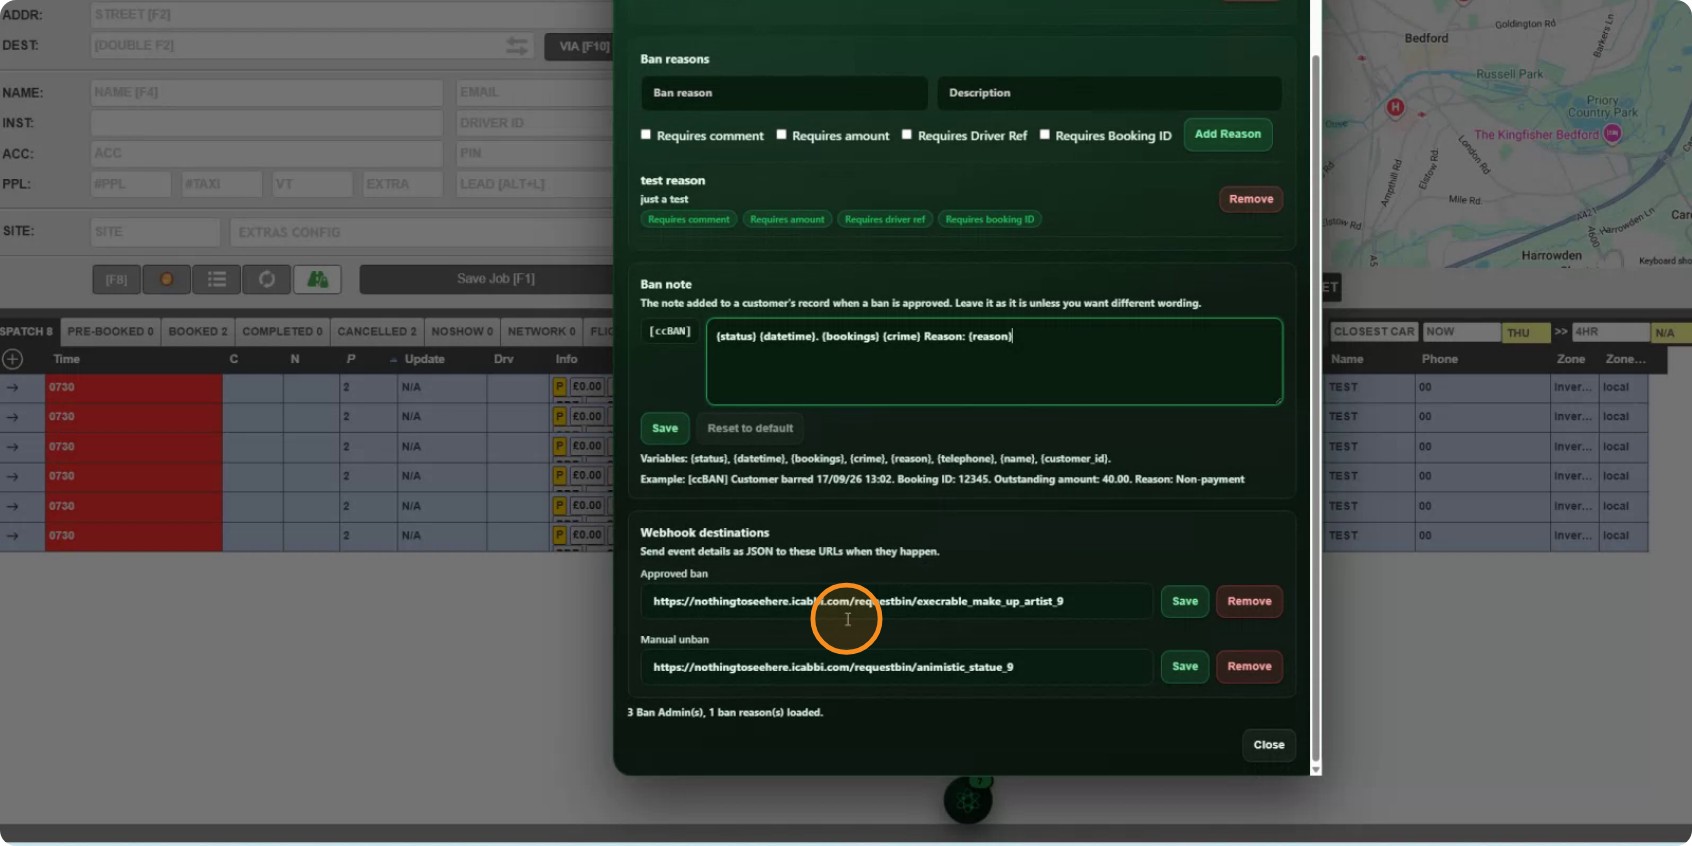
Useful if a third-party system needs to know. Leave both empty if not.
Raising a request
Step 6: Submit a ban request
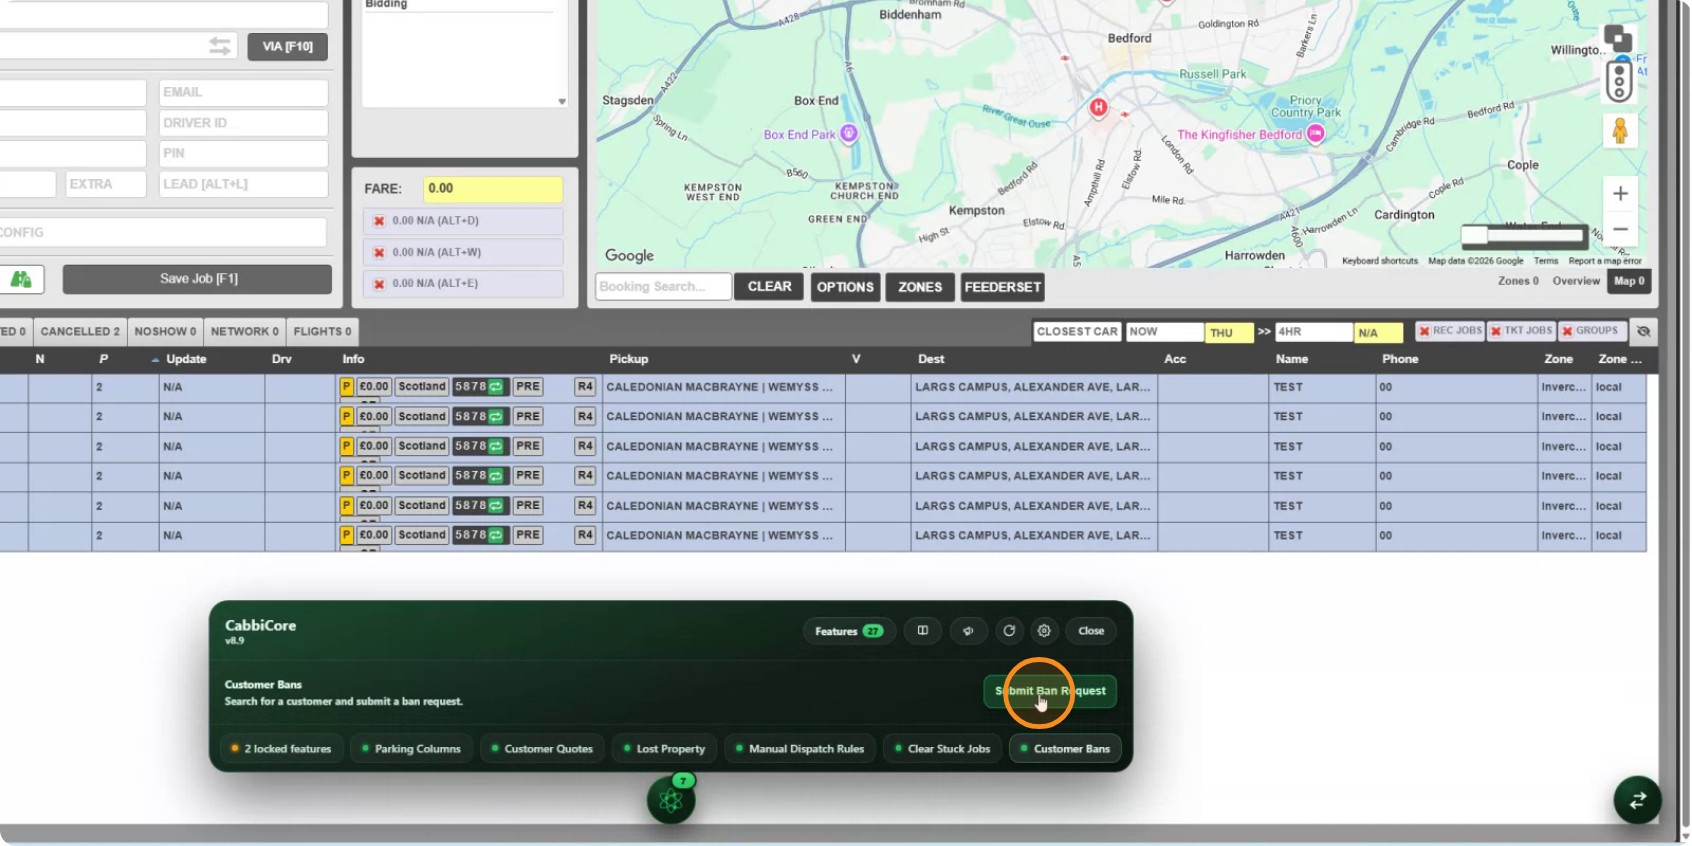
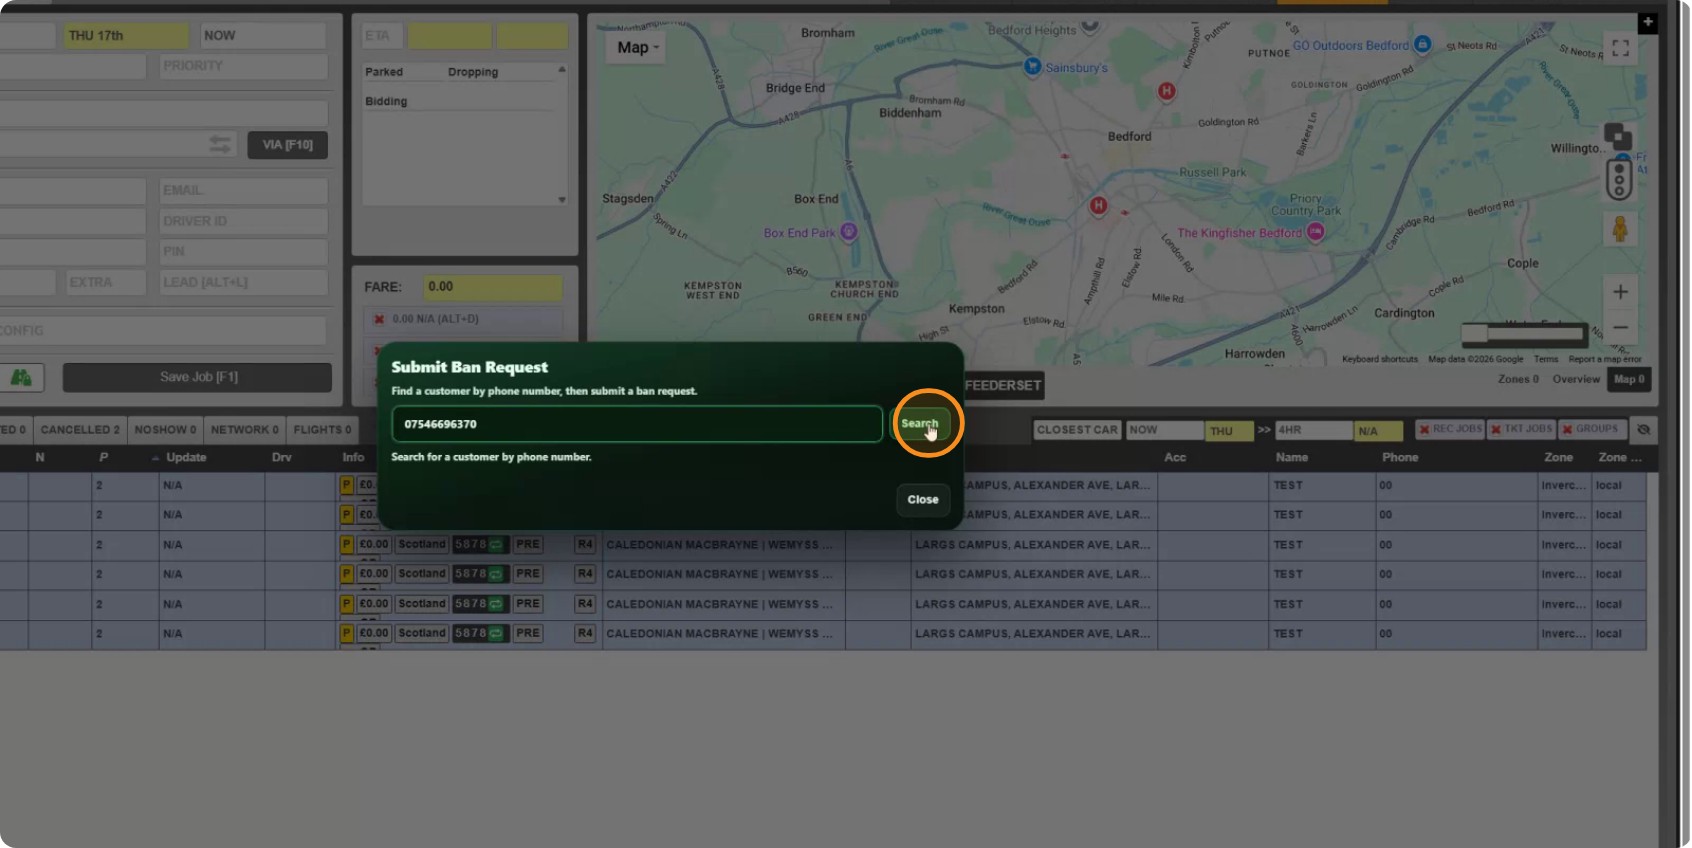
An operator opens Customer Bans and chooses Submit a Ban Request.
Search for the customer and pick the right record.
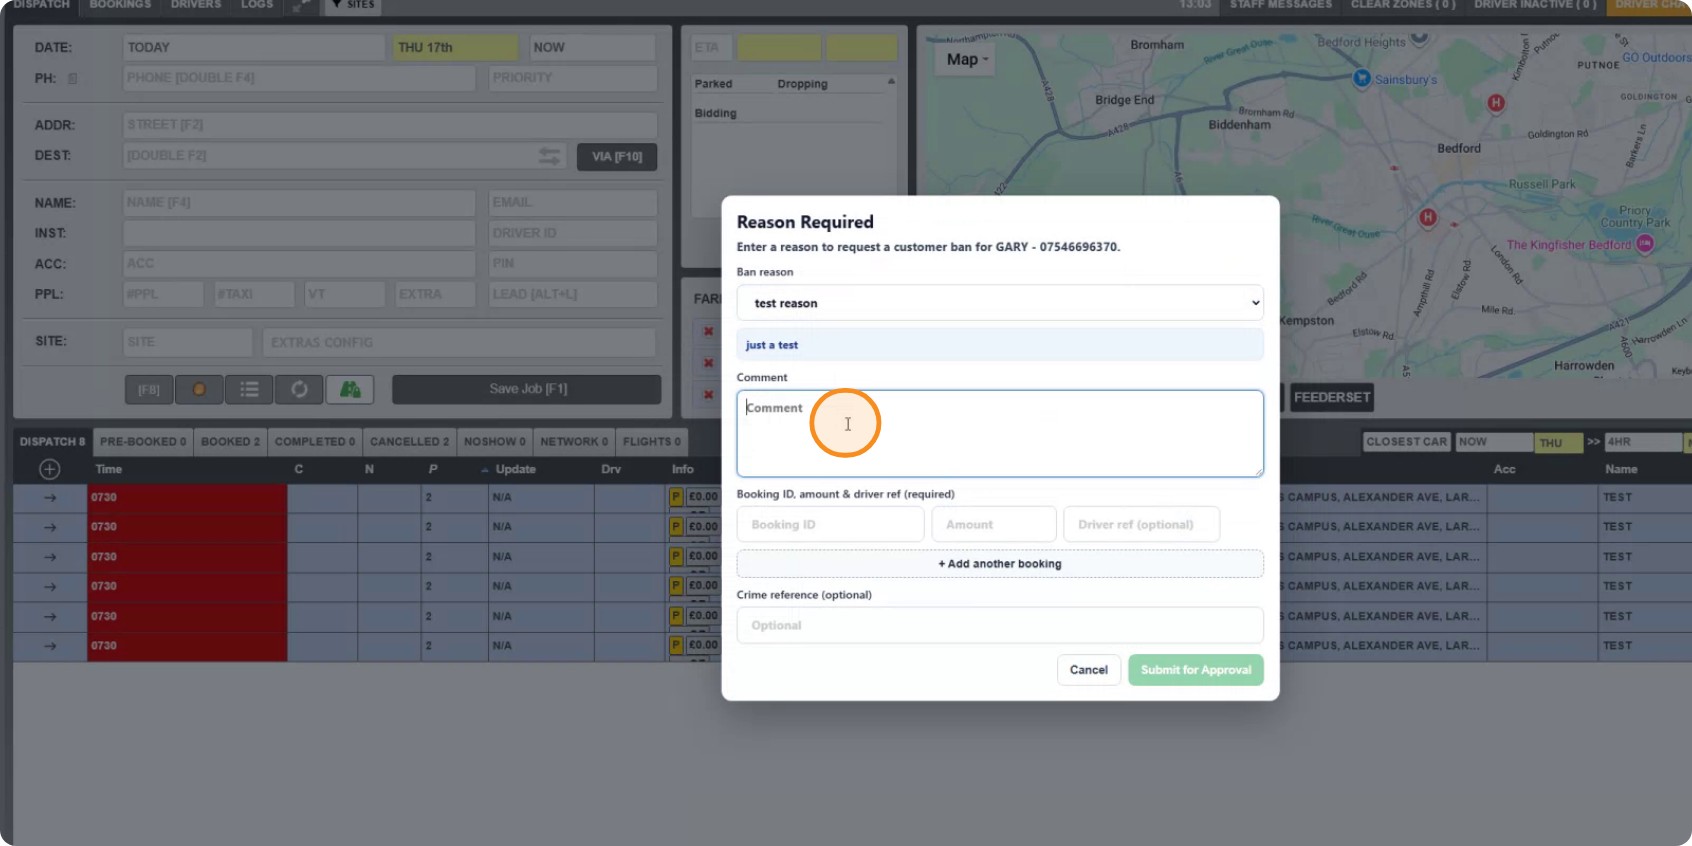
Choose a ban reason.
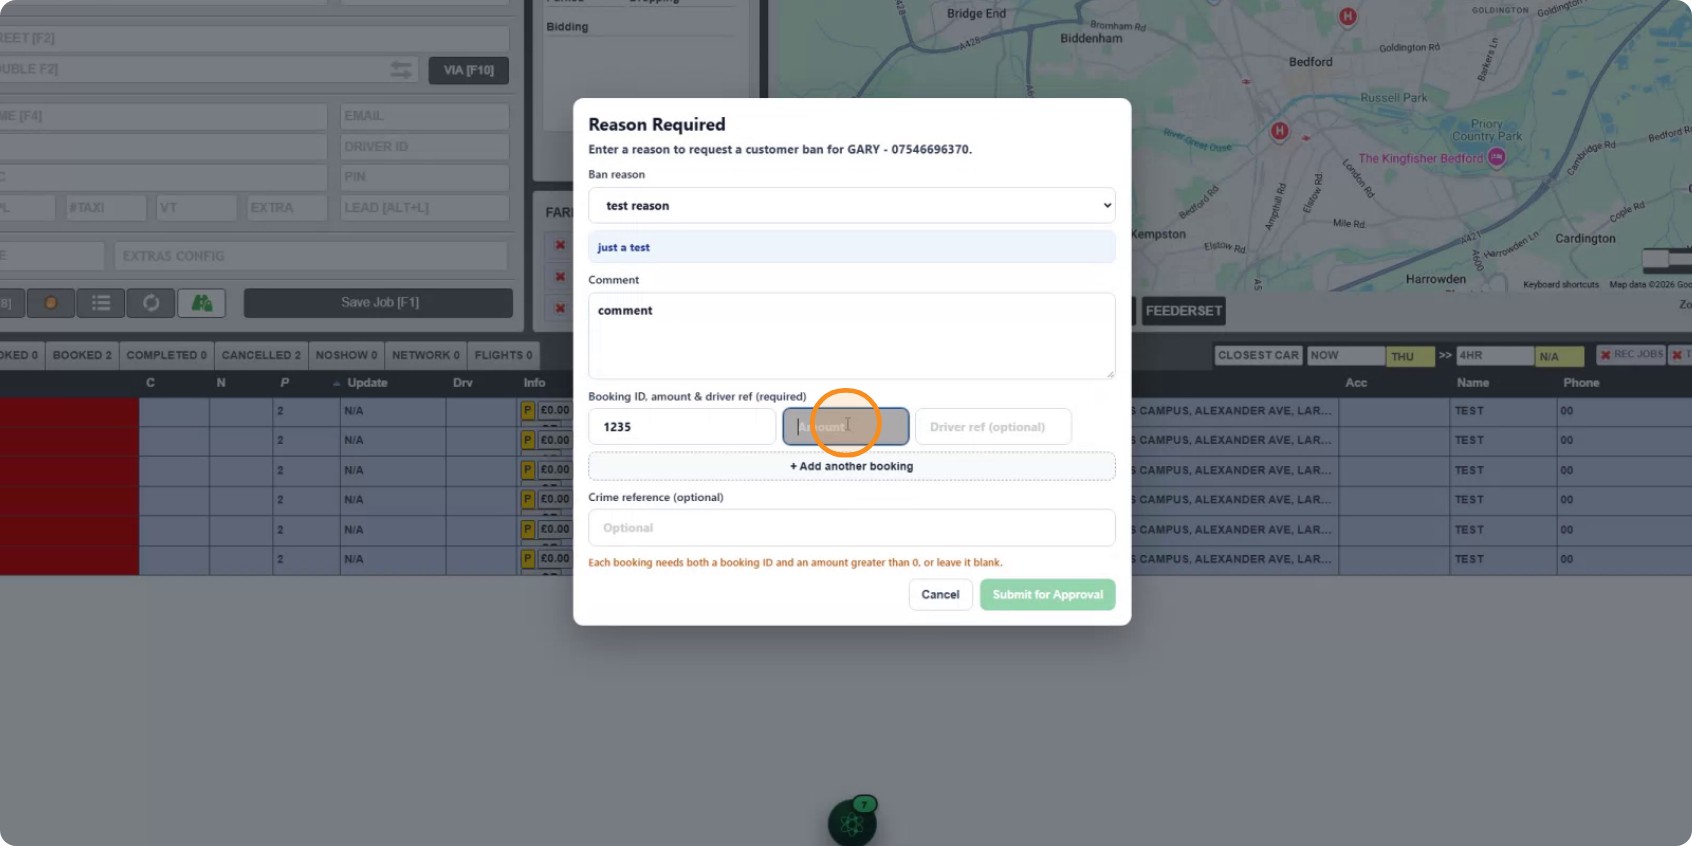
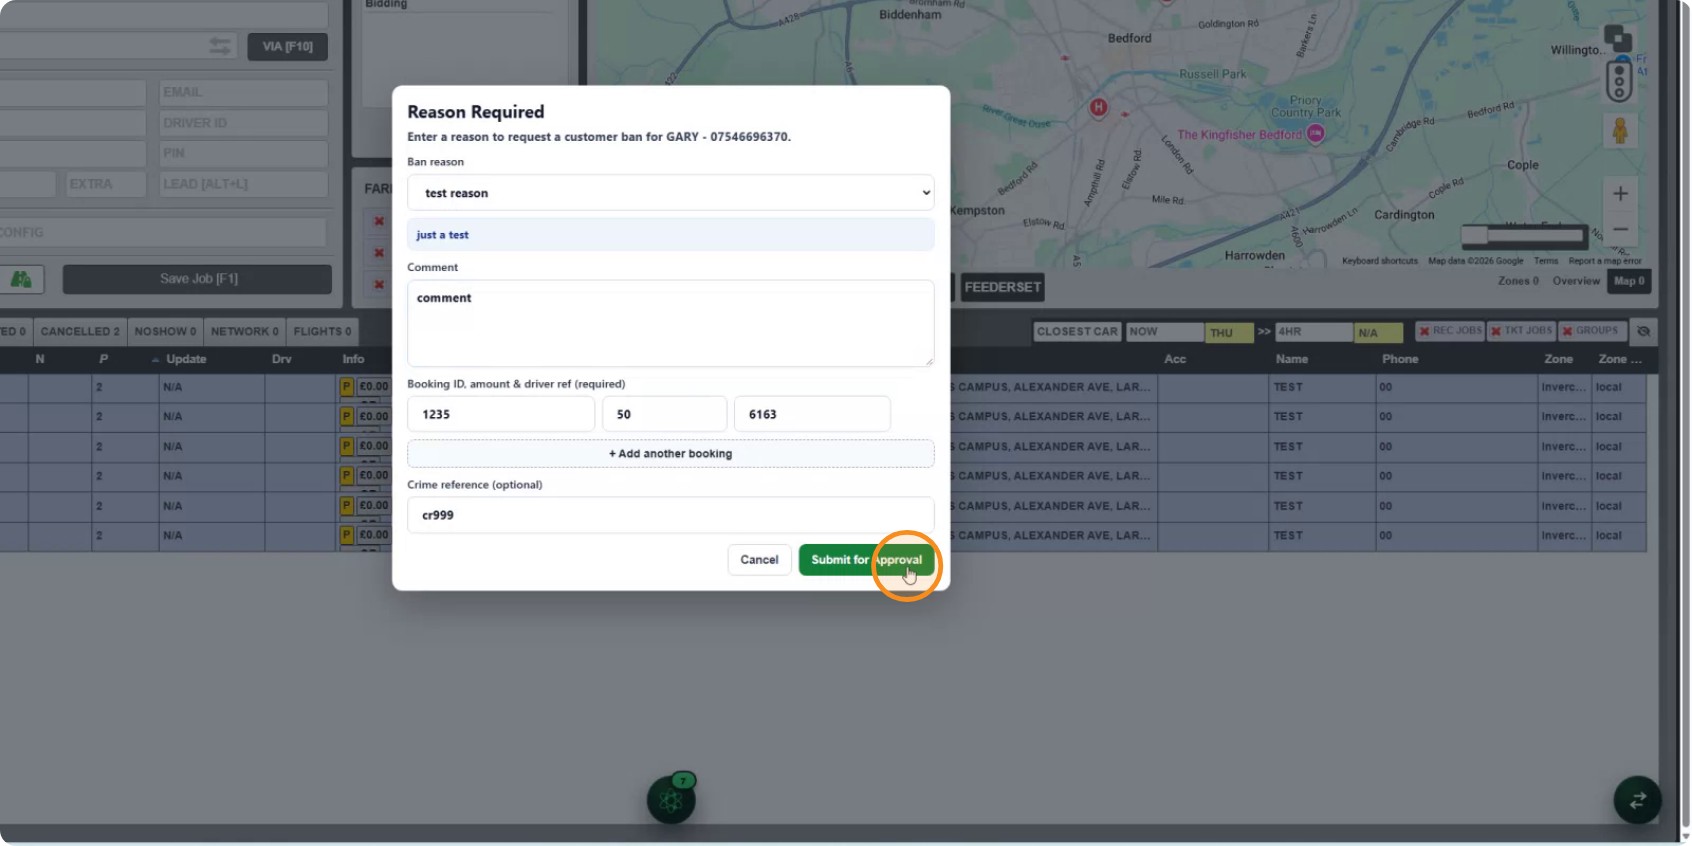
Then fill in whatever that reason asks for. Where a fare is owed across several jobs, add each booking rather than lumping them together — the approver sees them listed out.
Two things the form handles for you:
- Already banned? It says so and stops. No duplicate request.
- Request already pending? It offers to update the existing one instead of raising a second, so you can add what was missing.
Step 7: The approvers are told
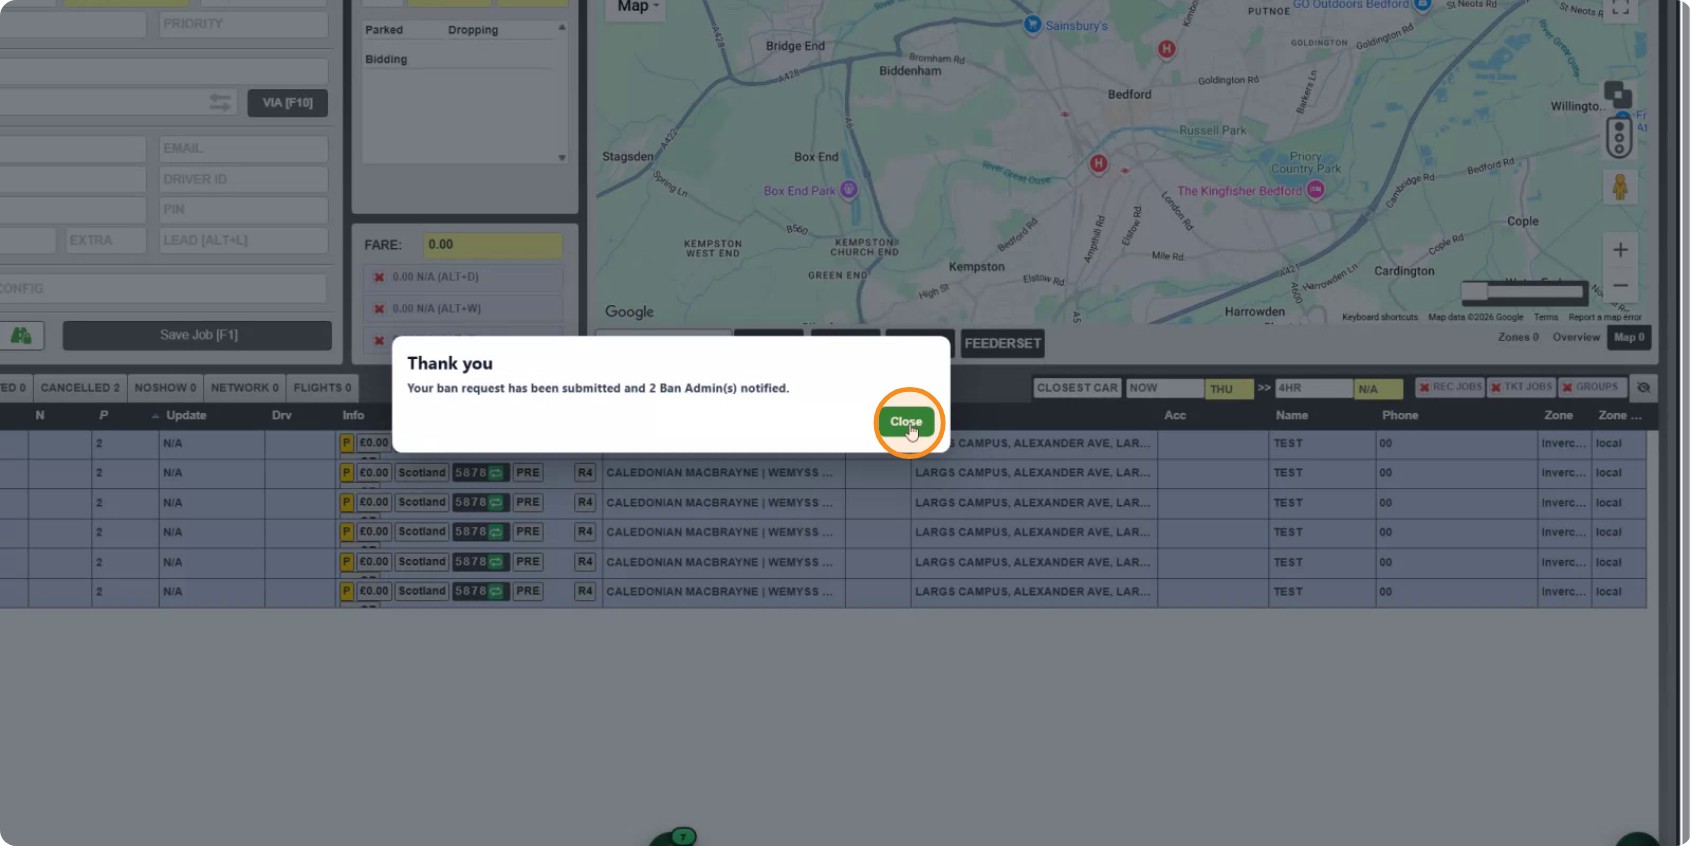
On submit, CabbiCore sends a dispatch message to every ban admin you named — not only the ones logged in at the time. The operator is told how many were notified.
Approving
Step 8: Review what is waiting
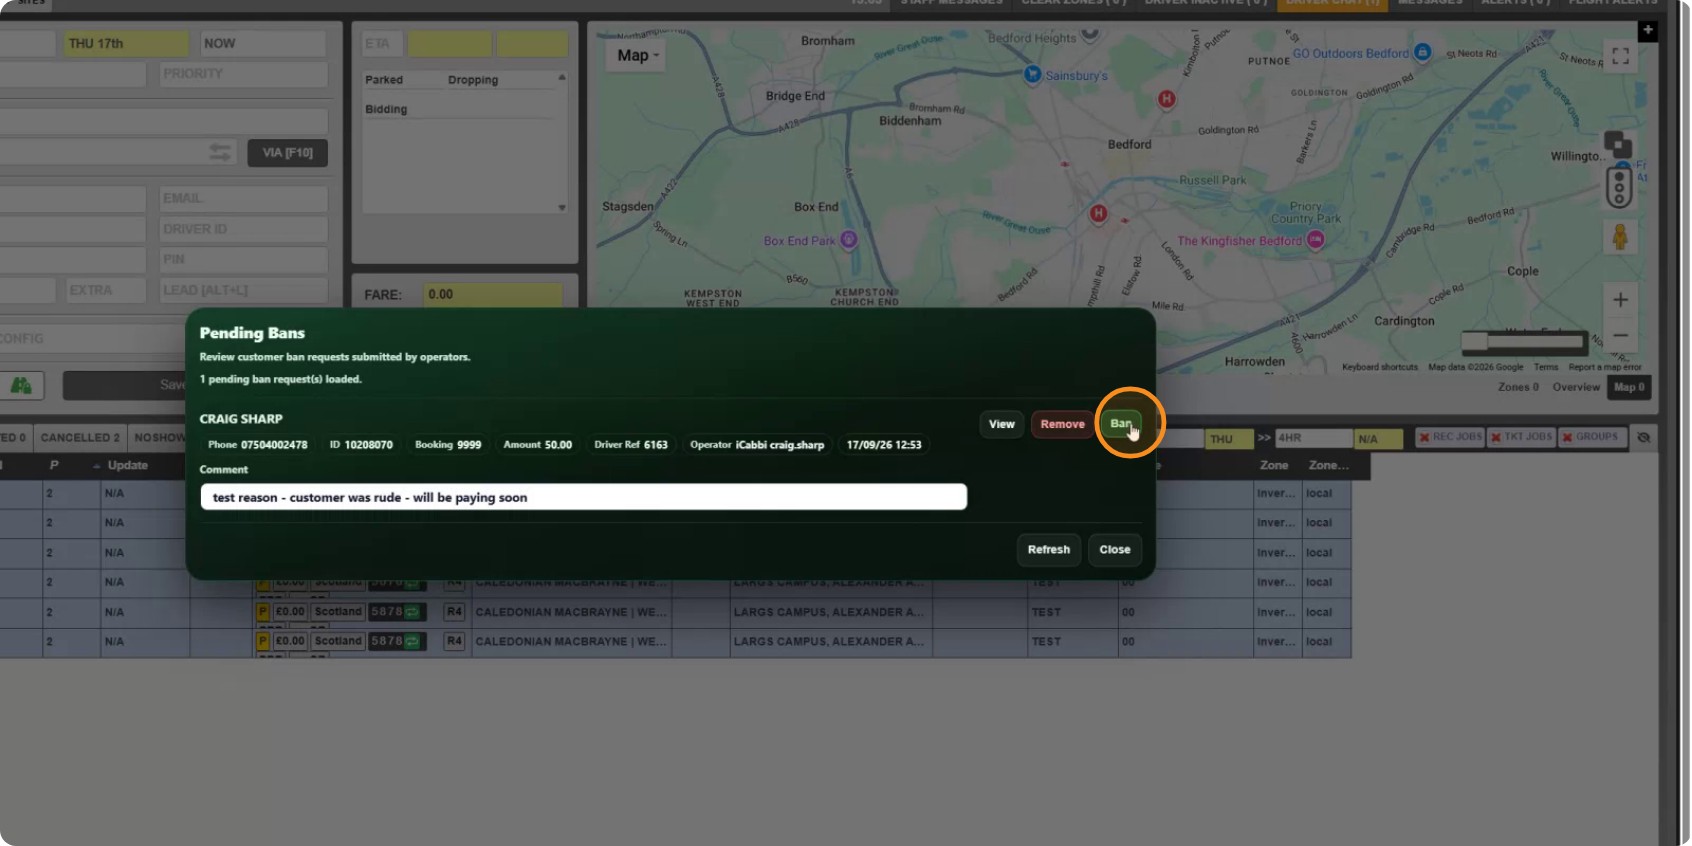
Ban admins open Pending Bans.
Each request shows the reason, the details the operator gave, and a way through to the customer in iCabbi if you want more context.
Step 9: Approve or remove
Approve applies the ban and writes the note. Remove rejects it. Either way it leaves the pending list.
You can edit the operator's comment before approving — worth doing when it will be read months later by someone who was not there.
Once approved, only a ban admin can lift it.